Invidious with NGINX Reverse Proxy on Arch Linux
Please inform Fedfree if the guide becomes out of date or if you spot any problems whatsoever. Invidious changes all the time, and so does Arch.
Introduction
This guide will teach you how to install Invidious on your own hardware, and run your own private or public instance. This is a special web-based frontend for YouTube, that allows you to bypass many of the annoying restrictions and anti-features on YouTube. For example, Invidious strips out all the ads.
A public instance with lots of users will also obscure which person is watching what video; routing it over Tor is also theoretically possible, though ill advised (but it will nonetheless be covered).
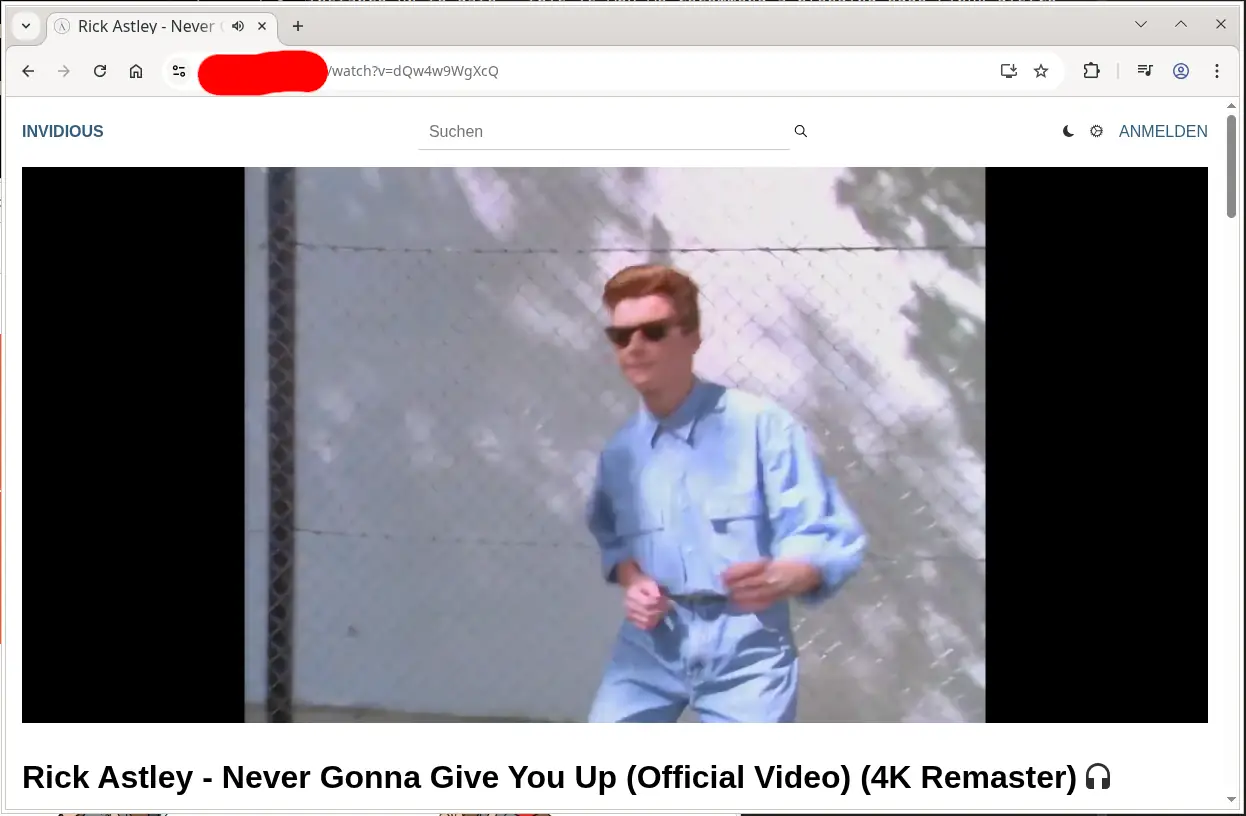
Invidious’s website is shown here:
https://invidious.io/
If you want to make a public instance, this guide also teaches you how to set up an NGINX reverse proxy. Information about NGINX setup on Arch Linux can be found in the Arch Linux NGINX guide.
We will be building it the right way: from source. The rolling release nature of Invidious (and accompanying dependencies) means that it’s often necessary to make small tweaks over time. Source code is simply more flexible for this.
WARNING: Technical skills required!
Arch Linux is one of the most ideal distros to run it on, precisely due to the rolling release nature of Invidious; if you’re running a “stable” distro like Debian, where dependencies are often out of date, you may struggle. For this latter use-case, the project also provides Docker images and so on. If you’re not reasonably comfortable using the shell and bootstrapping compilers, this guide is not for you.
If you’re the type of person who just wants something stock/easy, this guide is not for you. This guide was written, so as to provide a more streamlined reference than the upstream documentation, but patches were/are being sent to upstream based on this guide. Where possible, we avoid duplicating the upstream guidance, instead only referring to it, and telling you how to interpret it.
We will begin immediately. It is assumed that you are well familiar with Arch Linux, and in general how to use Linux. This guide is not for the new users, unless you’re an extremely adventurous new user who loves to learn. Carry on!
Install Git
We’ll be using Git heavily, to get all the upstream sources for Invidious.
As root:
pacman -S gitFirewall
NOTE: This section is first, because it is assumed that a lot of people will want to create private Invidious instances, accessible to only them and maybe a few friends. This section basically assumes that your regular use of the internet is done through static IPs.
Proper packet filtering is a necessity anyway. The way we’re going to configure invidious, is that invidious itself will not face the internet, nor any of its dependent services. However, we will use the nginx web server, leveraging its reverse proxy support. NGINX will listen on port 80 for LetsEncrypt/certbot purposes, but otherwise redirect to port 443 HTTPS.
Refer to https://wiki.archlinux.org/title/Ufw
Ignore this section but adapt accordingly, if you use something else, e.g. directly using iptables/ip6tables.
Normally, all you have to do is this (BE WARY of this if you’re using SSH to connect to the machine you’re installing Invidious on):
pacman -S ufw
systemctl enable ufw
ufw enable
This is a very simple setup. The ufw enable command blocks all incoming unsolicited traffic (stateful packet filter). You would then selectively whitelist whichever ports you want opened.
Please note that this will block SSH, and may break your session, so maybe add a whitelist immediately afterward, in case your SSH connection breaks:
# Only do this if you want to let *everyone* talk to your sshd:

ufw allow ssh
NOTE that you can use a different port if you have sshd running on something else. Refer to https://wiki.archlinux.org/title/OpenSSH which tells you how to configure SSH on your machine.
Regardless of other measures, you might like to whitelist SSH, instead of allowing all hosts. For example:
ufw allow from IPV6/xx proto tcp to any port 22
ufw allow from IPV4/xx proto tcp to any port 22
NOTE: In the above examples, change the IP address to any if you want to let just about anything in. Also note that tcp is specified; you must specify udp instead, if you want udp.
Replace IPV4 or IPV6 with the addresses you wish to whitelist, and replace /xx with the prefix/subnet for each IP. This is what I do on my own server, because I have fixed IPs, so I know I won’t get locked out (and when I’m out somewhere I can also get fixed addresses via IP tunneling - far beyond the scope of this article).
I just use ufw to block everything, and then whitelist what I want.
Now the next section will cover port 80 and 443, for HTTP and HTTPS. NOTE: If you can’t get static IPs, skip these next bits and just go to the next sections. In a later part of this guide, you will be presented with two choices: either proxy nginx via port 433 to invidious’s httpd on port 3000, and whitelist HTTPS access if wanting a private instance. OR: if you want a private instance, but you can’t get static IPs, you have two more choices: let EVERYONE access HTTPS, but put a password on it (we won’t covere this), OR: don’t proxy nginx or even install nginx at all, and just use port 3000 directly but leave port 3000 blocked and tunnel it via SSH (it’s up to you)!
Keep the previous advice in mind and decide carefully whether you want to do these next bits:
You could do:
# it's safe to let everyone use http, and certbot HTTP-01 challenges need it:
ufw allow http

# only do this if you want to create a *public* invidious instance:
ufw allow https
On my instance, I allow http, but I whitelist https, like so:
ufw allow from IPV6/xx proto tcp to any port 443
ufw allow from IPV4/xx proto tcp to any port 443
Replace /xx with the prefix/subnet size for IPv4/v6 respectively, and IPV6/IPV4 with your IPv6/IPv4 addresses respectively.
This is because I don’t want to run a public instance, but I want to be able to access my instance from anywhere in the world. I just whitelist whatever IPs I want, and I know how to tunnel to change my IP.
The LetsEncrypt HTTP-01 challenge still works, because I still open the regular HTTP (port 80) traffic to the world.
You could close HTTP as well, and only open it briefly while running certbot renew. It’s up to you how you set up your machine.
Because I have static IPs, including for my personal workstations, I can just whitelist everything, and access via NGINX reverse proxy in the browser. No SSH tunneling and no HTTP password screens. I intend to run mine as a private instance, but this guide will also tell you how to configure for a public instance. (for public instances, NGINX reverse proxy method is preferred)
I covered the firewall first, because it’s important that you do security first, and then open ports selectively as you need them. A lot of people mess this up and configure servers willy nilly, not aware that the entire world can see. For example, if you were running server side code and accidentally exposed a file with a password or something, while setting it up, you don’t want ports open.
NGINX packages
Only do this if you plan to set up a reverse proxy later:
pacman -S nginx certbotWe will not yet configure these; we’ll do this later.
There will be more dependencies.
Invidious dependencies
Refer to https://docs.invidious.io/installation/#manual-installation
This is the section that we will be using. We will not be using Docker or any other meaningless abstraction. We will be building everything we need from source, which is much more flexible and allows you to more easily tweak everything as desired.
Setting up nginx is only useful if you want to run a public instance, or a private instance like mine that you want to nonetheless access from the public internet (whitelisted access).
If you’re just running it on a LAN or something, for family/visitors, then you could just follow the rest of this guide and have invidious running on plain http on the default port 3000, and just use that; encryption is still desirable, even on a LAN (the only trustworthy host is localhost), but it’s up to you.
Install Crystal and Arch dependencies
Install via pacman, then downgrade
This is one possible way of installing it. Note that you’re still compiling from source here, because you’re using makepkg.
At the time of writing this guide, the latest version of Crystal supported was version 1.16.x, when building Invidious. Therefore, use of the Pacman package in Arch Linux was not possible, because it was at a newer release series.
See: https://wiki.archlinux.org/title/Downgrading_packages
Using the guidance there, the best way to do it is this:
Get the repositories for crystal and shards, and reset them to the old versions. For example:
https://archlinux.org/packages/extra/x86_64/crystal/
https://archlinux.org/packages/extra/x86_64/shards/
git clone https://gitlab.archlinux.org/archlinux/packaging/packages/crystal
git clone https://gitlab.archlinux.org/archlinux/packaging/packages/shards
cd crystal
makepkg
cd ../shards
makepkg
Adapt accordingly, if you need dependencies and such. This is like when compiling from AUR.
In each directory then, you would run this on the resulting .zst file created for your package (after running makepkg), as root:
pacman -U packagename-version-etc.zst
The benefit of doing it this way is that you can more easily remove the packages later, and/or update them to the main repo if that becomes possible later. At the time of writing this guide (October 2025), Invidious could only compile on Crystal versions up to the 1.16.x series.
If you notice the PKGBUILD for crystal, it has crystal as a dependency. That means it’s going to install new crystal to build the old version.
Read the downgrade guide linked above, for more info.
I chose not to do this method, in my instance. I compiled manually from source, first bootstrapping with the latest crystal package (crystal is needed to build crystal).
Use binaries from crystal
The crystal project itself provides several binary distributions of the crystal toolchain, and you can install shards this way too.
Installing from source is better, using this next method shown below, because you basically have more control over the process.
You might for example make a custom install location via PREFIX/INSTALL variables.
I opted for mthe build-from-source method, shown below:
Build from source
Use this option as an alternative. Only do this if you did NOT do one of the above methods.
NOTE: Installing Crystal/Shards can be done as normal Arch User if you wish. You don’t need to do this as the invidious user. We will simply install it to the host, in the system’s ’$PATH` as dictated by prefix.
Firstly, install the basic Arch dependencies for Invidious itself:
sudo pacman -S base-devel librsvg postgresql ttf-opensansYou will now install Crystal/Shards toolchain.
Refer to https://docs.invidious.io/installation/#install-crystal
This section of their guide links to crystal-lang.org in that project’s own documentation.
Pay close attention because Invidious may only work with specific versions of Crystal, which are mentioned in the section of Invidious’s documentation.
What I will write next may change, because projects move fast, but as of this day, 12 October 2025, Invidious documentation states that only Crystal versions 1.14.x, 1.15.x and 1.16.x are supported. This matters because, also on this day, the Arch Linux package for Crystal was at version 1.17.1.
Keep an eye on this. In my case, I decided to install Crystal version 1.16.3, from the commit, like so:
git clone https://github.com/crystal-lang/crystal
cd crystal
git reset --hard 3f369d2c721e9462d9f6126cb0bcd4c6992f0225
Adapt accordingly. I found this out by running git tag inside the crystal Git repository, to get the corresponding 1.16.3 version, matching this specific commit ID. If you ever need to use a newer crystal version in future, when Invidious changes, please pay attention closely and adapt. (please also tell us to update this guide!)
However, crystal is self-hosting; to compile crystal, you need crystal! The Crystal project provides their own bootstrap binaries that you can use; more is written about that on their website. When making this guide, I used the crystal package in Arch to build the older crystal toolchain, and then I deleted the Arch version before installing the one I compiled. It’s a bit naughty, but it can be done this way, but who knows if future versions of crystal will break compiling the older toolchain? You will adapt accordingly.
You could install Crystal from Arch repositories, and compile the older Crystal. This is what we shall do:
sudo pacman -S crystal shardsThis happened to work, on this day (12 October 2025) when Arch Linux had crystal 1.17.x in its repository. Again, the crystal project documents their own bootstrap process if you want to do it their way. You just need a crystal toolchain that works, for building the specific version you need. It’s the chicken and the egg, and first you need the chicken to lay the egg. Arch’s crystal package is the chicken, and your own build is the egg.
AGAIN: We will delete these packages later. We only have them installed temporarily, so that we can bootstrap the older crystal version.
Please also refer to https://crystal-lang.org/install/from_sources/ - this tells you how to build Crystal from source (using another Crystal version for bootstrap). Specific instructions gleaned from it are written below:
Firstly, you need dependencies. At the time of this guide, Crystal’s docs did not specify Arch dependencies, but they did specify Debian and Fedora. Adapting from those, we get:
sudo pacman -S \
    automake \
    base-devel \
    git \
    libbsd \
    libevent \
    gmp \
    pcre2 \
    openssl \
    libtool \
    libxml2 \
    libyaml \
    lld \
    llvm \
    zlib
The guide separately mentions that you need Boehm GC, at least version 7.6. Arch has this as the package gc:
pacman -S gcNow you can just follow Crystal’s build instructions, linked above.
You can pretty much just run this inside the crystal clone:
makeOnce done, you should remove crystal and shards from Arch packages:
pacman -R crystal shardsNow install crystal from the one you just compiled:
# make sure you're in the crystal directory

sudo make install
Now, per Crystal’s own documentation, we should also install shards. This is the dependency manager for crystal; I suppose you could say shards is to crystal, what cargo is to rust.
Find shards here: https://github.com/crystal-lang/shards
Remember again the crystal version we used:
commit 3f369d2c721e9462d9f6126cb0bcd4c6992f0225 (HEAD -> master, tag: 1.16.3, origin/release/1.16)
Author: Johannes Müller <straightshoota@gmail.com>
Date:   Mon May 12 21:45:25 2025 +0200

    Changelog for 1.16.3 (#15758)
It would probably be prudent to use a matching shards version.
Since we’re using a release version of crystal 1.16, from May 2025, we should use what was the latest release version of shards at that time, which would be:
commit 182792aa298983e573af57a8acdcd11dd815ad51 (tag: v0.19.1)
Author: Johannes Müller <straightshoota@gmail.com>
Date:   Thu Jan 23 20:52:50 2025 +0100

    Changelog for 0.19.1 (#666)
This was determined based on the release date of the Crystal version, and then the latest Shards version from that time was determined accordingly. Your own determination may differ.
Therefore, I did:
git clone https://github.com/crystal-lang/shards
cd shards
git reset --hard 182792aa298983e573af57a8acdcd11dd815ad51

# the correct revision to use will change. please adapt accordingly!
We will need dependencies. According to the README, we need, adapting for Arch Linux:
sudo pacman -S \
    asciidoctor \
    libyaml \
    ruby-molinillo
At this time of writing (12 October 2025), we just do, inside the shards directory (as regular user):
make bin/shardsYou should probably also run the test suites, as directed by the same readme:
make testOnce you’re happy, do as root:
sudo make installThe README said to use make docs to build the manpages, but that seems to have already been done when I ran make install. And you can just read the documentation on their website.
Now, hopefully, you have a fully bootstrapped crystal/shards setup, built from source with the desired versions.
It may have been better to make a PKGBUILD for this, but doing it this way is OK for now. Just make sure you keep these clones, untouched, in case you want to run e.g. make uninstall later (for example if you wanted to run stuff from Arch repos instead).
Clone invidious from Git
NOTE: PostgreSQL is a dependency, but it seems to be mainly used for user logins to an Invidious instance, for popular videos and so on. And maintaining user logins to your instance. Perhaps you might modify your own instance to not use postgresql, if you don’t need these?
As in the Invidious documentation, please make sure you clone as the user invidious - the systemd init files for invidious/invidious-companion assume they binaries are inside /home/invidious/invidious and /home/invidious/invidious-companion respectively.
NOTE: We’re not setting passwords for the postgres and invidious users, but they will be used nonetheless. This prevents anyone but root from being able to switch to these users; you can’t log in as these users. You also better make sure your sshd is configured to only use key-based authentication but that is beyond the scope of this article. (ssh as regular user, switch to root, then switch to postgres/invidious users as desired)
Refer to https://docs.invidious.io/installation/#add-an-invidious-user-and-clone-the-repository
Based on the guidance:
# You should be your regular Arch user here

# Now become root
su -

# Now you're 'root' user, add the `invidious` user:
useradd -m invidious

# And switch to that user:
su - invidious

# Now you're 'invidious' user:
git clone https://github.com/iv-org/invidious
exit

# You're root again
exit

# Now you're normal user again
The useradd command is done as root, of course. Then in that guide, it has you switch to the invidious user it had you create, to clone Invidious.
At the time of writing this guide, 12 October 2025, I used Invidious at commit ID 710b3f250baffb6b92b3190fb2b0c9c21c6d2c8b.
We will make use of the invidious git clone later.
Set up PostgreSQL
NOTE: Pay close attention, because you’ll be switching to a special user named postgres in this section, but this user’s HOME directory is /var/lib/postgres and not /home/postgres - something to keep in mind.
Not mentioned in the Invidious documentation at this time (12 October 2025), but there are certain initialisations that must be performed on PostgreSQL before you can actually use it.
Refer to https://wiki.archlinux.org/title/Postgresql
Install postgresql like so:
sudo pacman -S postgresqlThis will create the postgresql user, as mentioned above.
Basically, do this (after installing postgresql), assuming you were your regular user first:
# become root
su -

# switch to postgres user
sudo -i -u postgres

# NOTE: you could do instead of sudo: su - postgres

# Now you're the postgres user
initdb -D /var/lib/postgres/data

# switch back to root
exit

# now you're root again, enable postgres at
# boot, and also start postgres now:

systemctl enable postgresql
systemctl start postgresql

# become postgres user again
sudo -i -u postgres

# NOTE: again, you could also do: su - postgres

# Now you will create the database for Invidious
# Change CHANGE_ME to a secure password of your own choosing:

psql -c "CREATE USER kemal WITH PASSWORD 'CHANGE_ME';"
createdb -O kemal invidious

# become root again
exit

# become normal user again
exit

# now you're your normal user again
As the invidious user, I had to, while inside the invidious source directory, do this:
psql invidious kemal < config/sql/channels.sql
psql invidious kemal < config/sql/videos.sql
psql invidious kemal < config/sql/channel_videos.sql
psql invidious kemal < config/sql/users.sql
psql invidious kemal < config/sql/session_ids.sql
psql invidious kemal < config/sql/nonces.sql
psql invidious kemal < config/sql/annotations.sql
psql invidious kemal < config/sql/playlists.sql
psql invidious kemal < config/sql/playlist_videos.sql
It’s probably better to do that as the postgres user. You can check those files inside invidious, which contains the CREATE commands to use; that < part in the command just feeds the contents of those files into the command. These create the requisite tables for Invidious. When I installed Invidious one time, these seemed to be created automatically after simply creating the kemal user and invidious database, but another time, I had to create these tables manually, and then it worked.
You likely only ever need to do this once, the first time you ever installed PostgreSQL.
NOTE: The database password, that you chose above, will be used in your config.yml file later when configuring Invidious, so pay close attention at that point.
There are some other handy dandy sections of that Wiki page, but you should be good to go at this point. Carry on:
Configure Invidious
This next section is confusingly named, on the Invidious documentation, but now you will configure Invidious.
Refer to https://docs.invidious.io/installation/#set-up-invidious
Make sure you’re the invidious user, when following this section:
# switch to root, from your regular user:
su -

# switch to invidious user:
su - invidious

# change to the invidious git clone from before:
cd invidious
Their guide is a bit all over the place, so let’s get this out of the way first. Run this twice:
pwgen 16 1You can install pwgen from Arch Linux via pacman.
Run the command twice, to generate two keys. One of them will for Invidious itself (HMAC_KEY), and one will be for Invidious companion (invidious_companion_key).
To clarify:
pwgen 16 1 # for Invidious (HMAC_KEY)
pwgen 16 1 # for Invidious companion (invidious_companion_key)
Their guide has you compile Invidious itself. There is a template config that you copy and adapt. There are some keys that say CHANGE ME in there.
Compile invidious like so, as the invidious user, while inside the git clone:
# build invidious from source
make

# if the build succeeded, now create a config:
cp config/config.example.yml config/config.yml
Now follow Invidious’s page, adding to config/config.yml as directed. Pay close attention, because there are three lines to change:
Firstly, the password must be changed to the same one you used for your database user earlier. Find this line under the db: section:
password: your_password_goes_hereSecondly, find this line and change it to one of the two keys as created by pwgen, then you would like to use as the Invidious Companion Key:
invidious_companion_key: "CHANGE_ME!!"Thirdly, further down in that file, use the other key here on this line, using the other key that you generated with one of the pwgen commands:
hmac_key: "CHANGE_ME!!"

Change `hmac_key` to the HMAC key that you also made, earlier. You should make
sure that you don't use the same key for both of these.
Invidious systemd service
Refer to https://docs.invidious.io/installation/#systemd-service-for-invidious
DO THIS AS ROOT. As your normal user, do:
# become root
su -

# create the invidious service, and start it, also
# enabling it at boot time:

cp /home/invidious/invidious/invidious.service /etc/systemd/system/invidious.service

systemctl enable invidious.service
systemctl start invidious.service

# become normal user again
exit

# now you're the regular user again
This section has you set up the systemd service file for Invidious, so you must run these steps as root.
In the resulting service file, you see it executes invidious from /home/invidious/invidious/invidious, creating a log file in the process at invidious.log - you can obviously tweak this as desired.
Make sure you enabled and started the systemd service at boot, for Invidious.
Set up Invidious Companion
NOTE: It’s not clear in Invidious documentation on this day, 12 October 2025, so listen closely: the invidious-companion repository is cloned as the invidious user, into /home/invidious. When performing steps here that are not as root, make sure you’re doing them as the invidious user. This includes Rust/Cargo installation via Rustup.
Please also NOTE: This guide (Fedfree one) assumes that you compiled Invidious Companion from source. This means compiling Deno, which in turn implies compiling Rustc/Cargo - the latter will be done using Rustup. Please follow this section VERY carefully.
Refer to https://docs.invidious.io/installation/#set-up-invidious-companion
The companion is a separate program that you run alongside Invidious itself. The companion program is what handles video stream retrieval from YouTube, for example running YouTube’s JavaScript challenge. The companion is not part of Invidious itself, so you install and maintain it separately. Please note however that searching YouTube is handled by invidious itself (in the web interface where you search for videos via Invidious).
In Invidious documentation, it states that a binary release can be used, but I regard this as wholly inadequate for our purposes, since we need to keep all of this up to date all the time. However, upstream (Invidious) does a good job of maintaining their binaries, so if you don’t want to modify anything, then you may aswell use those (and then this guide would be useless to you).
Downloading and compiling it from Git is much more flexible, and you can often make your own little tweaks that way. Sometimes, certain fixes are necessary that may not be merged yet but are under code review by Invidious; as an operator, you may sometimes temporarily apply these fixes yourself, before they’re merged in the main branch, and then undo them later when you update to the latest main branch revision.
Source code is always better, for something like this, so we will be building from source.
Note that this can be done as a regular user, for this part (your normal default user on your Arch Linux machine):
DO THESE next steps as the invidious user:
# make sure you're user: invidious
cd ~/
git clone https://github.com/iv-org/invidious-companion.git
cd invidious-companion
Note that as of this day, 12 October 2025, the version I had when doing this was commit ID 6ce148bd7bb764090b553f7468bf019700f4de5e - but again, you should always use the latest version. Adapt accordingly, if something changes upstream (and please tell us if this guide needs updating - for example if they one day replace Companion with something else).
According to the documentation, we need to build it like so, BUT DON’T DO THIS YET:
deno task compileFirst, we need to install deno.
For that, we need Rust and Cargo to be installed.
Refer to https://docs.deno.com/runtime/getting_started/installation/
The upstream there recommends several methods, but we will do it the proper way. Please ignore everything there.
Refer to https://wiki.archlinux.org/title/Rust
You can install rust/cargo from Arch Linux package repos, but DON’T. Since you’re maintaining a lot of upstream sources yourself, as part of this Invidious installation, it’s better to use the upstream Rust version.
The best way to do this is using Rustup: https://rustup.rs/
However, rustup’s recommended installation method is crap too. Observe, but DO NOT RUN THIS (this is what rustup says to run, but DON’T):
# DO NOT DO THIS:
curl --proto '=https' --tlsv1.2 -sSf https://sh.rustup.rs | sh
(NOTE that you may also have to install curl from pacman)
Why is this bad? Well, observe again. Pay attention. You’re just downloading a script willy nilly and piping that to sh. Totally secure, right?
What if Rustup’s server got hacked one day, and fed you a malicious script? Piping curl into sh directly is pure madness, but this is unfortunately what a lot of projects recommend these days.
I’m oldschool. I check revisions, diffs and I check signatures/hashes.
If you’re going to simply use the current latest script as directed, that’s fine, but don’t just curl it into sh. Just download the file, without running it first, and look inside it, to make sure the script isn’t doing anything evil. This is because, no matter how benevolent rustup is (and they are quite benevolent), this is simply bad practise. Their own benevolence is readily apparenty, but quite irrelevant; it’s simply an insecure way to do things, for the reasons mentioned above.
So you could just do:
curl --proto '=https' --tlsv1.2 -sSf https://sh.rustup.rs > rustup.shNow read the contents of rustup.sh. I did that, and I can’t show you what was inside, because there was no license declaration, so how do I know that I’m even allowed to distribute it?
Let’s clone from Git instead. NOTE: Again, as stated above, please make sure you do this as the user named invidious:
# Make sure you're user: invidious
cd ~/
git clone https://github.com/rust-lang/rustup
cd rustup
NOTE: At the time I wrote this, the revision I got for rustup was commit ID f4f46e03e009fbaf3d1ae77e1e45f3334c9f9be8.
I could immediately see a file in that repository called rustup-init.sh, which was almost identical to the rustup.sh script I created, so this seems to be the right file. Who the hell knows what version rustup.sh was? Turns out, I know.
After a bit of leahing, the version I got seems to be from release tag 1.28.2 (commit ID e4f3ad6f893e56ca10f0a329c401a5eafab69607) in the rustup Git repository. Great!
Yeah, that’s the other thing; even if the script is safe, how do you know what version you’re curling at any given time? And how do you know that they keep this version up to date?
And though the rustup-init.sh file didn’t have a license declaration in it, the repository itself had two files in it at the time:
LICENSE-APACHELICENSE-MIT
What the hell does this mean? Without a declaration in the file itself, I don’t know what license it falls under. Is it dual license Apache/MIT??
This is why you should always check what you’re running. For my uses, this is fine, but as a commercial user I might think twice (in practice it’s probably fine, but individual copyrightable files should ideally each have a correct licensing header e.g. SPDX).
I decided to run the absolute most bleeding edge rustup-init, which at this day (12 October 2025) was commit ID f4f46e03e009fbaf3d1ae77e1e45f3334c9f9be8.
Make sure you’re the user invidious here!
cd ~/rustup
./rustup-init.sh
And just follow what it says. I just picked the standard installation.
NOW:
Check .bashrc in your home directory. It should have a line like this at the end:
. "$HOME/.cargo/env"You may alternatively and/or find the same line in .bash_profile, which loads .bashrc. Tomato, tomato.
However, because you’re still logged in, you won’t have loaded the env file yet.
Same problem in that file by the way (no license declaration, falling back on the LICENSE- files in the rustup Git repository). All that env script does is manipulate your PATH environmental variable. This gives you newer rustc and cargo binaries, and it goes first in PATH, so that it overrides whatever you host may have installed. This is useful, because then it overrides whatever you installed from Arch repos, for example.
Now log out of your Arch machine, and log back in again.
LOG OUT
OR:
Instead of logging out, you could just do this in your terminal:
. "$HOME/.cargo/env"and then log back in. If you’re on SSH, this means disconnect and reconnect. If you were using a screen session, kill it.
When you log back in, switch back to the invidious user:
su -
su - invidious
Once you do, you should have the newer cargo version, or even have cargo at all (if you didn’t have it before). In my case, I could then do, and please note that I did not have rustc/cargo installed in pacman, only rustup:
[invidious@archlinux ~]$ cargo --version
cargo 1.90.0 (840b83a10 2025-07-30)
(of course, this assumes you’re even using GNU BASH at all. Adapt accordingly, if using something else. You just need to make sure your PATH is set, as in that env script referenced above. And if you are using something other than GNU BASH, which is the default on Arch, you’re probably savvy enough to know that already)
Right, now we can install deno, needed for compiling Invidious Companion. Do this, as your invidious user in Arch Linux, as per the guidance on https://docs.deno.com/runtime/getting_started/installation/, but again don’t follow the instructions shown there immediately. You’ll be building it from source, as mentioned on that page. Specifically, it advises to compile deno using the Cargo package manager.
Do this as the user invidious as before! Like so:
# Make sure you're the user: invidious

cargo install deno --locked
Since this is tied to the Cargo version you’re installing, then updating Cargo and all packages within it will also keep Deno up to great.
This will take a while, so please be patient. We first needed Cargo installed, for this to work. Cargo is basically a source-based package manager for Rust, allowing you to easily import all kinds of libraries and dependencies for your Rust project. Cargo is pretty nice. No wonder Rust is so popular. Everyone says memory safety this, concurrency that, generic that, but it’s Cargo that makes Rust actually appealing for developers. I digress.
Excellent. Once that’s finished, you can see something like that:
[invidious@archlinux ~]$ deno --version
deno 2.5.4 (stable, release, x86_64-unknown-linux-gnu)
v8 14.0.365.5-rusty
typescript 5.9.2
Ok, now we can install Invidious Companion. And again, make sure that you are currently the user invidious when doing this. Once again, refer to https://docs.invidious.io/installation/#set-up-invidious-companion, which says how to build from source like so:
# Make sure you're the user: invidious

cd ~/invidious-companion
deno task compile
Invidious documentation for some reason has you manually run the Companion, but there’s no point in doing that unless you really want to; controlling it with the systemd init file will do quite nicely.
Their guide has you download the systemd service file for invidious companion, but why? It’s just downloading from the repository you already cloned!
As the root user, do
cp /home/invidious/invidious-companion/invidious-companion.service /etc/systemd/system/invidious-companion.service

# Now edit it:
vim /etc/systemd/system/invidious-companion.service
The benefit of copying it is that then you also know it came from the repository commit that you (hopefully) vetted first.
Or whatever editor you use if not vim. Look for the line:
Environment=SERVER_SECRET_KEY=CHANGE_MEOn that line, change CHANGE_ME to your invidious_companion_key string that you generated earlier.
You’ll note that the service file executes /home/invidious/invidious-companion
As per entries specified in there, for the bind paths, you must also create these directories.
First, switch to the invidious user:
# create this one while logged in as the invidious user

mkdir /home/invidious/tmp
Next, as root user:
# create this one as the root user:

/var/tmp/youtubei.js
The Invidious documentation doesn’t articulate that these directories need be created! Without them, systemd will not start the companion service.
Now enable the companion at boot, and also start it:
systemctl enable invidious-companion.service
systemctl start invidious-companion.service
Test invidious
Invidious should hopefully be working now. Its web interface is on port 3000.
Please note that when I tested this at first, IPv6 wasn’t running. It was only listening on IPv4, but it did listen on my WAN address. I whitelisted myself to access port 3000, and could use it.
Sure enough, I ran a port scan with nmap and I could only access it via IPv4 on the WAN.
This is OK, because:
- If making a public instance, we will use nginx reverse proxy anyway, and it can listen on IPv6.
- If making a private instance, with static IPs whitelisted, we also use an nginx reverse proxy.
- If making a private instance, without static IPs, you could leave SSH open to the world and do a remote SSH tunnel (e.g. 3000 on your server, and bind it to maybe 3001 or something, on your local machine).
- If you’re just doing this for LAN-based clients, IPv4 is totally fine.
More on these later.
WARNING: Remember that Google blocks invidious IPs if detected. If you want this to be a private instance, make sure Google can NEVER access your instance. Make sure when you run it that only YOU can access it.
(even if running a private instance, Google might still detect you as a bot - how they do it cannot be specifically audited, but for example if the JS in Invidious doesn’t match YouTube’s, sometimes that can get you blocked, and Invidious has to constantly tweak that themselves, so make sure you always keep Invidious updated)
Hardening
Now we want to harden Invidious. As counter intuitive as it may seem, you will now configure Invidious to only listen on localhost.
As the invidious user, do:
cd /home/invidious/invidious
vim config/config.yml
Replace vim with whatever editor you use.
Find this line:
#host_binding: 0.0.0.0Or something like that. Uncomment it, and change it to say:
host_binding: 127.0.0.1We only want Invidious to listen locally. We will use NGINX reverse proxy to expose it to the world as we wish - or you can SSH tunnel into your machine and forward its local port 3000 on 127.0.0.1, to your workstation’s port of your choosing.
Now restart invidious, as root:
systemctl restart invidious.serviceNow if you’ve still got SSH into the server, you could try SSH tunneling:
ssh -N -L 3001:127.0.0.1:3000 username@server -p 22While that tunnel is up, then try in your browser, the address http://localhost:3001/ - and if you see your invidious instance, great!
With this set up, we can now do the NGINX reverse proxy. NOTE: We don’t need the SSH proxy for NGINX, this was just a test. Also, test test assumed that you had SSH tunneling enabled in OpenSSH to begin with. Configuring SSH is beyond the scope of this article!
NOTE: If you don’t want to run NGINX reverse proxy, and you just want your own personal private instance, you can stop here. You’re done! A private-only use of Invidious could be done this way, by creating a tunnel connection!
NOTE: You might use autossh instead of ssh. Autossh runs ssh, but makes the connection again when it breaks, which can be useful if your internet goes down!
There are lots of other settings here, but they are documented on the Invidious website; simply study them yourself, and set these to whatever you want.
NGINX reverse proxy
Installing NGINX is its own job.
Please refer first to the basic Arch Linux NGINX guide guide if you didn’t already set up NGINX your own way.
Once you’ve got the basic NGINX set up running, including LetsEncrypt, come back here and continue this guide.
Once you’ve got nginx up and running, you can see:
https://docs.invidious.io/nginx/
Adapting from that page, we can make an nginx block looking something like this:
server {
	server_name example.com;
	listen 443 ssl;
	listen [::]:443 ssl;
	listen 443 quic reuseport;
	listen [::]:443 quic reuseport;
	http2 on;
	http3 on;

	ssl_certificate /etc/letsencrypt/live/example.com/fullchain.pem;
	ssl_certificate_key /etc/letsencrypt/live/example.com/privkey.pem;
	ssl_trusted_certificate /etc/letsencrypt/live/example.com/chain.pem;

	location / {
		proxy_pass http://127.0.0.1:3000;
		proxy_set_header X-Forwarded-For $remote_addr;
		proxy_set_header Host $host;    # so Invidious knows domain
		proxy_http_version 1.1;     # to keep alive
		proxy_set_header Connection ""; # to keep alive
	}
}
At the time of writing this guide, the Invidious setup differed a bit, because I’m also enabling http2 and 3 in my setup; I also have a separate block as in the Arch Linux NGINX guide, so I don’t bother with that here.
Also, as in that same NGINX Arch Linux guide, I adapted my /sbin/reloadservers script that I’ve got on a crontab:
#!/bin/bash

ufw allow http
certbot renew --webroot -w /usr/share/nginx/letsencrypt
systemctl reload nginx
ufw delete allow http
This is because I also whitelist HTTP, in addition to HTTPS. I only open plaintext HTTP when I need to renew certificates.
I have additional, specific rules set in ufw, that specifically allow whitelisted IPv4 and v6 addresses that I use, to access this instance.
Invidious’s own recommendation has you adding these lines to your NGINX block:
    access_log off;
    error_log /var/log/nginx/error.log crit;
I didn’t bother. If something’s wrong, I’ll turn on logging to debug whatever problem I have, but during normal operation it’s fine; this is only my own private instance, so who cares?
Post-installation
As in the Invidious documentation, Invidious can get a bit buggy when run for a few hours, so they recommend restarting it hourly. You could just run a script like this on your server:
#!/bin/sh

while true; do
	systemctl restart invidious
	sleep 3600
done
Or perhaps use systemd timers? Or stick it in a crontab. In fact, this is precisely what I will do (as in the Arch Linux NGINX guide, I re-enabled crontab because I hate using timers).
Add this crontab for the root user:
0 * * * * systemctl restart invidiousTroubleshooting
Any troubles with starting the invidious or invidious companion services can be found by running this as root:
journalctl -xeThis can also be used when things are normal, to view certain logs. For example, when you’re accessing a given video, you’ll see GET requests logged in the journal.
HACK: Force Invidious Companion to use IPv4
Google is notorious for detecting Invidious instances, and blocking IPs. When I used my IPv6 prefix for invidious-companion, I frequently got the anti-bot login warning.
Observe:
/*
force-inet4-or-inet6.c - hack to force applications to use IPv4 or IPv6 exclusively

compilation: cc -fPIC -shared -DUSE_INET4 -o force-inet4.so force-inet4-or-inet6.c
         cc -fPIC -shared -DUSE_INET6 -o force-inet6.so force-inet4-or-inet6.c

usage: LD_PRELOAD=/path/to/library.so program args ...

This file is in the public domain.
*/

#define _GNU_SOURCE
#include <sys/types.h>
#include <sys/socket.h>
#include <netdb.h>
#include <dlfcn.h>

int
getaddrinfo(const char *hostname, const char *servname,
                const struct addrinfo *hints, struct addrinfo **res)
{
        int (*getaddrinfo_original)(const char *, const char *,
            const struct addrinfo *hints, struct addrinfo **res);

        struct addrinfo *hints2 = hints;

        getaddrinfo_original = dlsym(RTLD_NEXT, "getaddrinfo");
#if defined USE_INET4
        hints2->ai_family = PF_INET;
#elif defined USE_INET6
        hints2->ai_family = PF_INET6;
#else
#error You must define USE_INET4 or USE_INET6.
#endif

        return (getaddrinfo_original(hostname, servname, hints2, res));
}
This is based on: https://gist.githubusercontent.com/winny-/7367518/raw/f098ef540c7ebbb9e148055365cec4205c4484c9/force-inet4-or-inet6.c
The version above is based on the link, but modified to fix compiler errors because the original had implicit arguments in that pointer, and modern GCC don’t like that.
Anyway, I found that if I disabled IPv6 on my server, so that I only used IPv4, the Companion worked again - perhaps my IPv4 addresses will get blocked too at some point, but for now it works.
Save the above pasted C code as force-inet4-or-inet6.c and compile it twice, like so:
cc -fPIC -shared -DUSE_INET4 -o force-inet4.so force-inet4-or-inet6.c
cc -fPIC -shared -DUSE_INET6 -o force-inet6.so force-inet4-or-inet6.c
I saved the resulting files to /usr/local/lib/, like so (and as root):
cp force-inet4.so /usr/local/lib/force-inet4.so
cp force-inet6.so /usr/local/lib/force-inet6.so
NOTE: This only works for dynamic linked binaries, which they probably are in your case. If you used static linking, these won’t work.
I couldn’t yet figure out how to integrate that into the systemd service file for Invidious Companion, so I disabled the systemd service:
systemctl disable invidious-companion
systemctl stop invidious-companion
You could, when you boot your server, start a GNU Screen session and run the Companion inside that, as the invidious user, and start it like so:
export SERVER_SECRET_KEY=your_invidious_companion_key
LD_PRELOAD=/usr/local/lib/force-inet4.so /home/invidious/invidious/invidious_companion
Perhaps make it a script, that you run at system startup? Like this:
#!/usr/bin/env sh

set -u -e

export SERVER_SECRET_KEY=your_invidious_companion_key

companion="/home/invidious/invidious-companion/invidious_companion"

while true; do
	LD_PRELOAD=/usr/local/lib/force-inet4.so "$companion" || :

	sleep 10
done
Alternatively, you could force it to use IPv6; for example, if your network setup is a bit weird and doesn’t resolve IPv6 addresses first, you could force it that way.
HACK: Invidious Companion via Tor
NOTE: DON’T do this. This was written for academic reasons, because I wanted to see how well it works. YouTube heavily rate-limits Tor users, or just blocks it, and Tor is slow in general. Don’t abuse Tor exit nodes. Please.
WARNING: Invidious itself still browses YouTube for search and so on; the companion only handles video streams, so only that would be behind Tor.
So all your IPs are blocked, eh? Can’t just keep cycling these around, can you?
If you just can’t make Invidious Companion work properly, on any of your IPs, you might consider routing via Tor.
Install the packages in Arch:
pacman -S tor torsocksNow edit /etc/tor/torrc and find this line and uncomment it:
#ControlPort 9051Also find this line and uncomment it, setting it to zero:
#CookieAuthentication 1Set it to zero like so, uncommented:
CookieAuthentication 0Now simply enable the Tor service at boot time:
systemctl enable torAnd start it now as well:
systemctl start torI didn’t integrate this with the systemd init file yet, so I just run it manually.
You could, when you boot your server, start a GNU Screen session and run the Companion inside that, as the invidious user, and start it (via Tor) like so:
export SERVER_SECRET_KEY=your_invidious_companion_key
torify /home/invidious/invidious/invidious_companion
Perhaps make it a script, that you run at system startup? Like this:
#!/usr/bin/env sh

set -u -e

export SERVER_SECRET_KEY=your_invidious_companion_key

while true; do
	torify /home/invidious/invidious/invidious_companion || :
	sleep 10
done
Please know: this may be incredibly slow at times. Google will also block a lot of Tor exit nodes routinely, so you might find that it only works intermittently. However, this is better than nothing.
Please also consider that if you’re running a large public instance of Invidious, routing through Tor will probably provide a very slow experience for your users; it also puts huge strain on the Tor network’s bandwidth.
Perhaps consider also running a Tor exit node? Treat it like torrents: in torrenting, it is good etiquette to seed at least 30 percent more than you download, so perhaps the same logic could be applied here. Donate at least 30 percent more bandwidth to the Tor, compared to what you consume from it.
You can also force Tor to generate a new circuit, like so (make sure you have the netcat package installed):
printf 'AUTHENTICATE ""\r\nsignal NEWNYM\r\nQUIT\r\n' | netcat 127.0.0.1 9051Google will routinely block IPs, so perhaps in some cases you might force it every ten minutes, with a script like this (running as root):
#!/usr/bin/env sh

set -u -e

while true; do
	printf "Forcing Tor IP circuit reset (new IP)\n"
	printf 'AUTHENTICATE ""\r\nsignal NEWNYM\r\nQUIT\r\n' | \
	    netcat 127.0.0.1 9051 || \
	    printf "WARNING: Can't netcat tor" 1>&2

	sleep 600
done
NOTE: If you change IP addresses too often, you can run into conflicts, because the links provided by YouTube are for a given IP address at run time; if your address changes too often, you might notice (for example) that your video will just stop, and you have to refresh the page. Therefore, forcing it like this might not be wise - doing it manually, when you need to, is probably a better idea. Like if you suddenly got bot-blocked, you could quickly switch Tor circuit a couple times as needed.
You can find more notes about Tor in the Arch Wiki:
https://wiki.archlinux.org/title/Tor
And of course, on the official Tor Project website:
https://www.torproject.org/
TODO: maybe write about I2P as well?
SOCKS proxy in Companion
Just refer to unixfox’s guide:
https://docs.invidious.io/hide-instance-behind-proxy-server/
It tells you how to set up haproxy on VPS services. You can use this to cycle through IPs on your instance, when handling YouTube streams. Your instance’s own IP address (as it is accessed) does not change, but this means that Invidious Companion will use a different IP. This can be used to circumvent YouTube’s block on your IP addresses over time, and you can quite easily just keep spinning up new proxies as you go.
Contrary to the above torify setup, Companion itself has a way to configure socks proxies within itself. This is the preferred way to do it, and it’s what some instances do themselves!
NOTE: the github links require javascript
See issue:
https://github.com/iv-org/invidious-companion/issues/16
It refers to these lines in the code:
https://github.com/iv-org/invidious-companion/blob/master/src/lib/helpers/youtubePlayerHandling.ts#L4-L6
https://github.com/iv-org/invidious-companion/blob/master/src/main.ts#L6
From these lines, we see:
In outubePlayerHandling.ts:
import type { TokenMinter } from "../jobs/potoken.ts";
import { Metrics } from "../helpers/metrics.ts";
let youtubePlayerReqLocation = "youtubePlayerReq";
In main.ts:
import { retry } from "@std/async";These files seem to be, located within the invidious companion source code, at the following locations:
src/lib/jobs/potoken.jssrc/lib/helpers/metrics.ts
There is also:
src/lib/helpers/youtubePlayerHandling.ts
I would recommend just looking at every file in src/lib/helpers/ if you want to configure your own proxying inside Invidious.
If you use Invidious itself for proxying, on your own instance, perhaps get in touch with us about how you configured yours? I’m not going to mess with it myself at the time of writing this guide, but this section can be updated in the future, with reference to the upstream documentation/code, for more ways to configure it.
For my own purposes, my main IP addresses seem to work fine, and I can use my Tor setup if I need to.
As I was told on the Invidious matrix chat room, the source code is the documentation; indeed, I couldn’t find much useful information in the documentation proper.
Youtube login cookies
The yt-dlp program has a useful feature that you can access via the --cookies-from-browser argument, e.g.:
yt-dlp --cookies-from-browser chromium URL_HEREIf you’re logged into YouTube on your browser, this can be useful as yt-dlp will re-use the session. This can bypass age-restriction, and also bypasses the anti-bot measures.
From what I can tell, Invidious does not (as of 12 October 2025) have anything comparable to this; it has some relevant features that are deprecated, according to the developers. There is also an oauth feature, not yet working; right now, there is no feasible way to bypass the IP blocks except to switch around IPs as discussed.
TODO:
This could be an interesting feature edition, in a future revision of Invidious. Perhaps the same feature could be ported from yt-dlp?
Final notes
If you’re going to make your instance publicly accessible, please note that Google is liable to block your IPs. Some instances circumvent this by rotating on residential IPs, often via tunneling.
Note that Google now blocks an entire IPv6 prefix, when they detect suspicious activity from your IPv6 address.
You may also wish to install Anubus or Go-away on your server, to deter bots (especially AI scrapers); such is not covered by this guide, but many invidious instances do just that.
The whole point of invidious (and other projects like freetube, yt-dlp, yt-x and so on) is to allow more choice over how you access YouTube, but it’s always a game of cat and mouse between YouTube and the maintainers of these projects, so you should expect frequent breakage.
Make sure to keep all of the software and configurations on your Invidious instance up to date - this is why we recommend a bleeding edge Linux distro like Arch Linux, if you’re going the way of custom builds.
This entire guide had you build everything from source, but if that’s not your cup of tea, the Invidious project (and several of its dependencies e.g. Crystal and Rust) do provide binaries that you can use, and there are docker images that you can use for Invidious which a lot of people use.
Here at Fedfree we do it oldschool, and source code is always going to be much more flexible, hence this guide.
Further configuration
The upstream documentation contains a vast about of knowledge, which you may find useful:
TODO: We could make a religion AUR package out of this!
Anubis
No, not the jojo stand.
Anubis is a very special thing, that I didn’t bother setting up for this guide because I don’t need it. But look here:
Basically what it does is send not a lot of text, but a small script that your browser has to run, completing a cryptographic proof of work challenge. The idea here is to make it expensive for bots to access your site. This is recommended for public instances that will likely be attacked by a lot of mostly LLM bots (these days), that will perform what is essentially a DDoS attack on your website.
There’s also go-away, and perhaps others.
I was going to make a guide for this, but I can’t be bothered. Maybe I’ll do a guide separately, at some point.
Updating your sources
So you installed Invidious/Companion eh? Great!
Now please read the Git documentation on https://git-scm.com/ to know how to manage Git repositories.
Invidious sources
You can basically run git pull inside the invidious/ and invidious-companion/ directories while logged in as the invidious user.
Then to compile the new code when updates are available, you’d just compile them again, e.g. for Invidious:
makeand for invidious-companion:
deno task compilerustup updates
If you followed this guide, you probably install rustup, and info about maintaining/updating your rustup installation can be found here:
https://rustup.rs/ - for my case, I didn’t curl into shell like they said, as you saw earlier, I ran the latest rustup-init.sh script from the latest git repository of rustup. To update that, I do as the invidious user:
cd rustup
git pull
./rustup-init.sh
It gives me some options. I just picked the option again to proceed with the selected options; this would replace whatever was installed before. A useful README file is included within the rustup repository.
crystal/shards
Remember earlier in this guide, I mentioned installing a specific version. If you ever need to update to a newer version in the future, you could just do first as your normal user where you cloned it before:
cd crystal
su
make uninstall
exit
Then update to the newest source:
git pullIf you then want to reset back to a specific version (different than what you had before), you could do that, as in previous guidance.
Then just do the build again, and install it again as before.
Same thing for shards, pretty much.
other updates
cargo, pacman, etc
See cargo documentation about how to update packages you installed inside it, e.g. deno, if you need to.
Arch Linux and packages from pacman (or AUR) can be updated using the guidance on the Arch Linux wiki: https://wiki.archlinux.org/title/Main_page
postgresql updates
When updating major postgresql versions, you must migrate the database. This means that you need to also still have the old binary available for migration, post-update.
Arch Wiki has some information about this, in the article for Postgresql.
See: https://wiki.archlinux.org/title/PostgreSQL#Upgrading_PostgreSQL
Note especially the need for the postgresql-old-upgrade package. This simply installs the previous major version, relative to the current one. This means that you have the old binary in /opt, as per the linked guide on Arch Wiki, for migrating the database to a new Postgresql version.
Alternatively, you might want to stay on a specific version of Postgresql for a while if you can’t be bothered; arch wiki’s pacman article has instructions about downgrading packages.
glibc/kernel updates
Not explicitly set up in this guide, because it was already provided by Arch Linux.
However, if you’re compiling sources against the current running libc, it stands to reason that old builds may break, since these builds will be dynamically linked.
Even if other sources don’t change, it might be prudent to change when uppdating via pacman (updating Arch packages) whether glibc is being updated, and re-build sources afterward.
When updating the Linux kernel, please note that a reboot isn’t always really needed, but it’s generally considered good practise.
If you don’t want to have to keep updating your Linux kernel as often, Arch Linux has an LTS (long term support) Linux package.
Just install linux-lts in pacman if you want the LTS kernel. And make sure that’s your default kernel at boot time. The arch wiki has information about how to do this. LTS kernels might make more sense on a server. Linux has a strict policy about not breaking userspace in newer kernels, which means that older kernel versions can also usually run newer userspace things (everything used in this guide such as invidious is all running in userspace).
Have fun!
Markdown file for this page: https://fedfree.org/docs/http/arch-invidious.md
This HTML page was generated by the Libreboot Static Site Generator.